
Hey there, future scientists and explorers! Ready to turn your kitchen into a super cool science lab and uncover the magic hidden in everyday stuff? Science isn't just about tricky formulas and white coats; it’s all about being curious, asking 'what if?', and having an absolute blast finding the answers. It’s the fizzy pop of a reaction, the awesome swirl of colours, and that 'whoa!' moment when you see something amazing happen right before your eyes.
In this guide, we've gathered some of the most exciting, hands-on activities that make learning about STEM (that's Science, Technology, Engineering, and Maths) a total party. We'll show you how to build an erupting volcano, cook up your own gooey slime, and even make invisible ink appear from nowhere. These projects are perfect for curious minds, whether it's a rainy day, a school project, or just some weekend fun.
Just like in the book Space Ranger Fred and the Shoelace Adventure, where Fred uses his sharp eyes and smart thinking to tackle a tricky challenge, these experiments will get you thinking like a real scientist. This list is your go-to for fun science for kids, filled with simple steps and easy explanations. So, grab your safety goggles (or just your excitement), and let’s dive into a world of spectacular discoveries!
1. Volcano Eruption with Baking Soda and Vinegar
The baking soda and vinegar volcano is a classic science experiment that has wowed kids for ages. This hands-on activity is a super fun introduction to chemistry, showing off the power of an acid-base reaction. By mixing simple things from your kitchen, you can create a foamy, bubbling "lava" that erupts from a model volcano. It's a fantastic, hands-on lesson in chemical reactions and geology, and a top-tier example of fun science for kids.
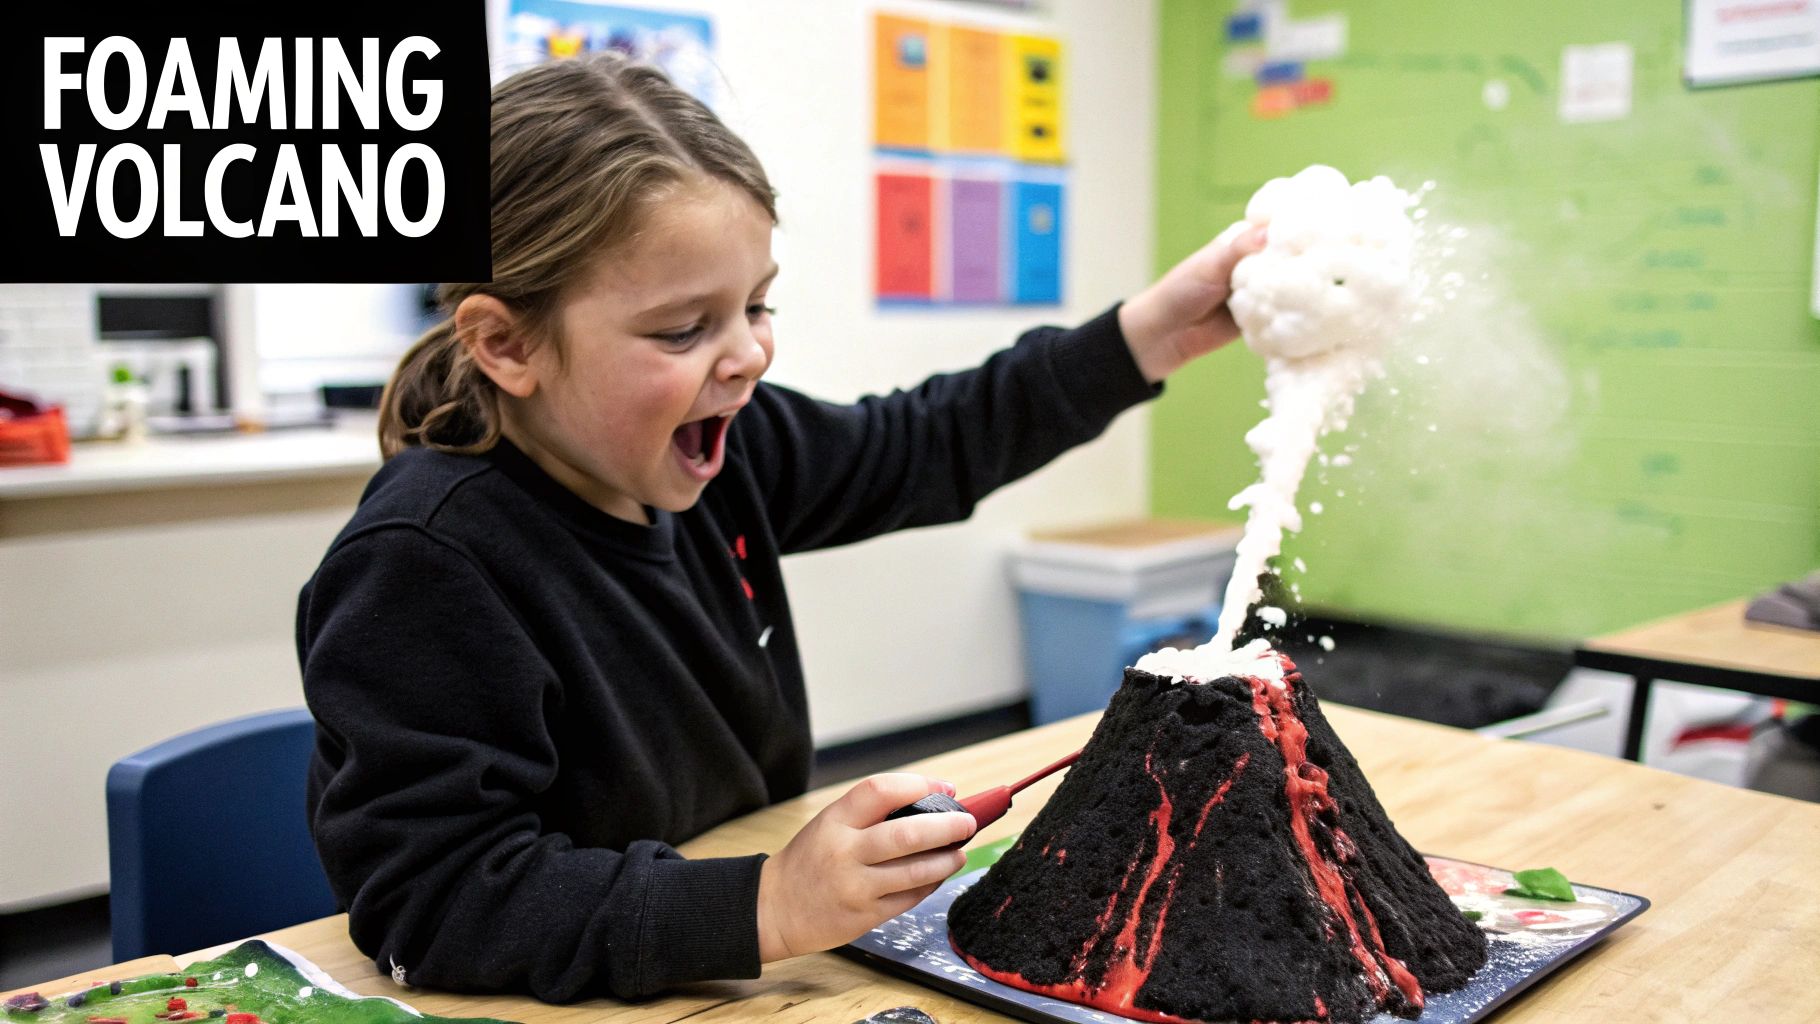
This experiment is a brilliant way to explain that when an acid (vinegar) and a base (baking soda) mix, they create something totally new. In this case, the fizzing eruption is all thanks to the creation of carbon dioxide gas. This principle of cause and effect is a core concept in many STEM adventures, a bit like the problem-solving in the book Space Ranger Fred and the Umbrella Rescue, where understanding a simple action leads to a big, clever solution.
How to Create Your Eruption
This experiment is perfect for a weekend afternoon and teaches fundamental scientific principles in an unforgettable way. It’s ideal for children aged 6-12 who are beginning to explore scientific concepts.
- Build Your Volcano: First, construct your volcano around a small plastic bottle or cup. You can use play-doh, modelling clay, or even dirt and sand in the garden for a more rustic look. Place it in a baking tray or plastic tub to contain the mess.
- Prepare the "Magma": Inside the bottle, mix a few tablespoons of baking soda with a squirt of washing-up liquid and some red or orange food colouring. The soap helps create more bubbles, making the "lava" flow thicker and more realistic.
- Trigger the Eruption: When you're ready, pour vinegar into the bottle and stand back. The reaction will happen almost instantly, creating a fantastic, fizzing eruption that flows down the sides of your volcano.
Pro Tip: For a more vigorous and faster reaction, try using slightly warmed vinegar. The increased temperature speeds up the rate at which the molecules react, resulting in a more dramatic eruption.
2. Slime Making Laboratory
The slime making laboratory is a fantastic, hands-on chemistry experiment that allows children to become material scientists in their own kitchens. This tactile activity dives into the fascinating world of polymers, demonstrating how simple ingredients can link together to form a completely new substance. By mixing a polymer (like PVA glue) with an activator, children create a non-Newtonian fluid, a material that acts as both a solid and a liquid, offering an unforgettable lesson in chemistry and physics. It's a hugely popular example of fun science for kids for a very good reason.
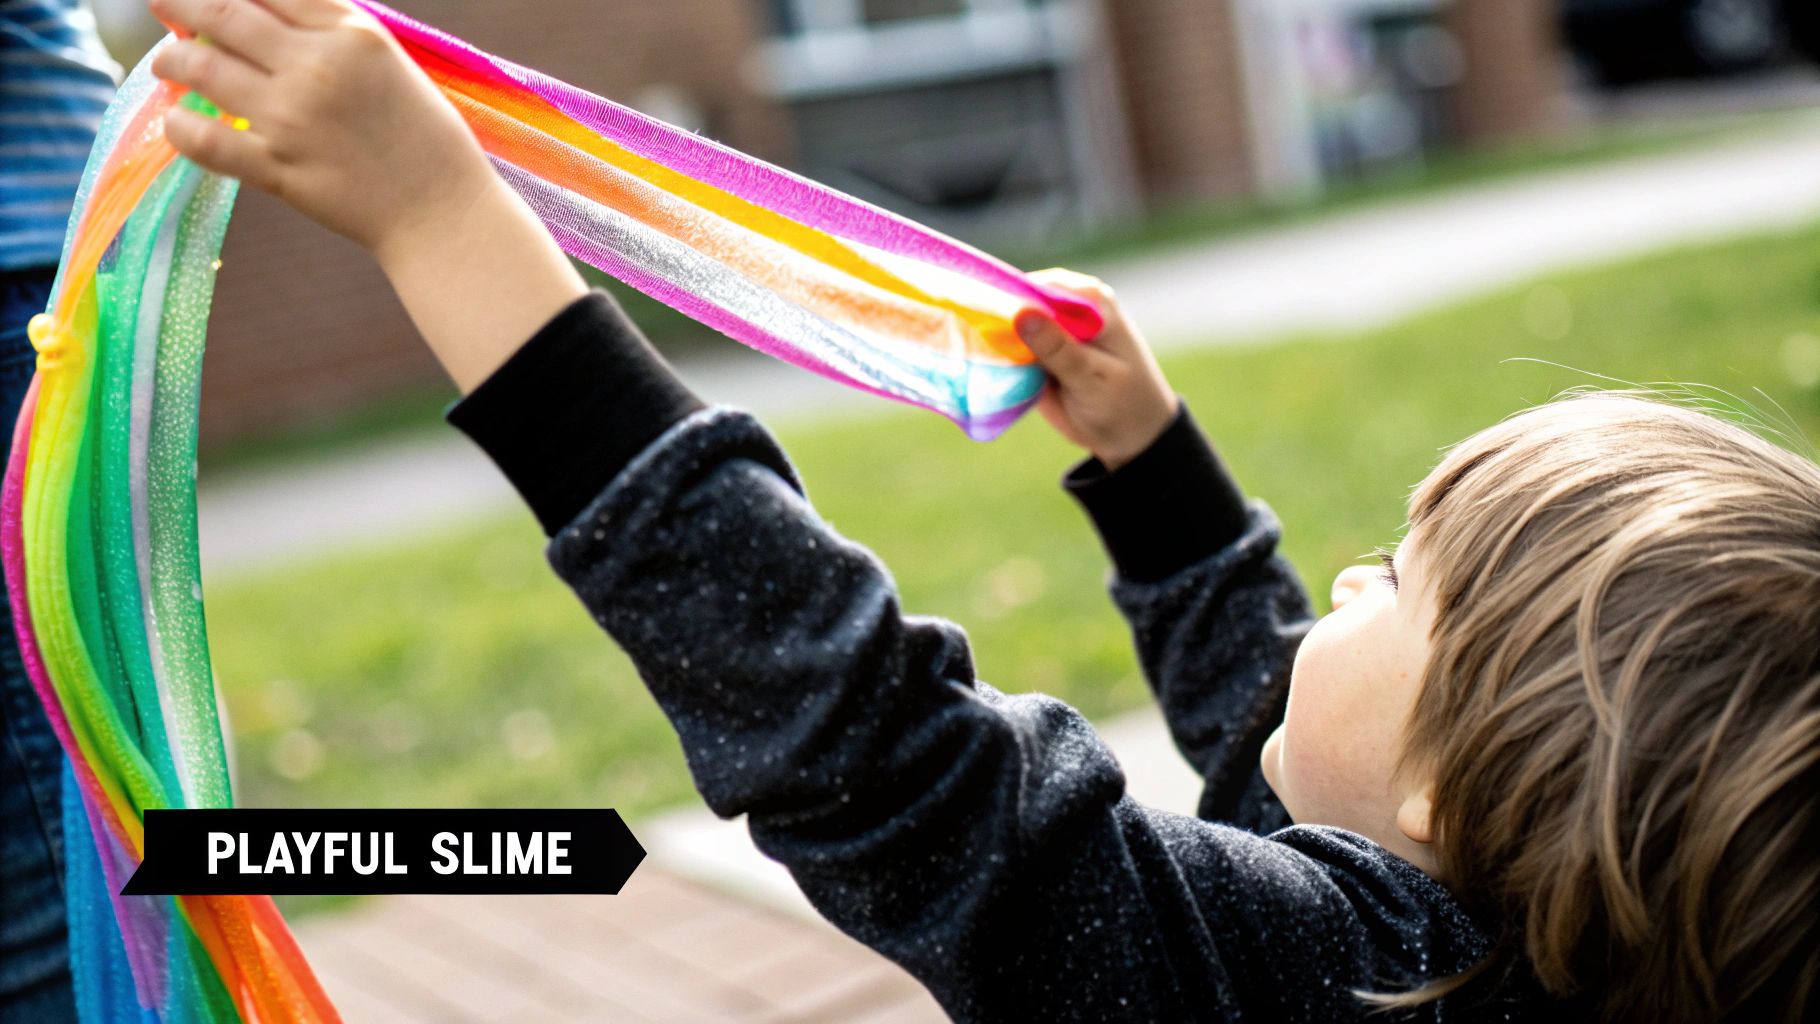
This experiment is a brilliant way to explain how long-chain molecules, called polymers, can be cross-linked to change their properties. The activator creates chemical bonds between the glue's polymer strands, making it thick and stretchy. This process of transformation is a core scientific concept, much like the problem-solving journey in Space Ranger Fred and the Tick Tock Tale, where understanding how parts work together is key to fixing a complex machine. You can find more details about this and other great science experiments for children on spacerangerfred.com.
How to Create Your Slime
This experiment is perfect for a rainy afternoon and teaches complex chemistry in a fun, sensory way. It’s ideal for children aged 6-12 who enjoy creative and messy play.
- Mix Your Base: In a bowl, pour about 120ml of white PVA school glue. Add a few drops of your favourite food colouring and some glitter if you're feeling sparkly. Mix everything together thoroughly.
- Prepare the Activator: In a separate cup, dissolve half a teaspoon of borax powder in about 120ml of warm water and stir until it's completely dissolved. Alternatively, you can use a contact lens solution that contains boric acid and sodium borate as a safer option.
- Create the Slime: Slowly add the activator solution to your glue mixture, a little bit at a time, while stirring continuously. You'll see the mixture start to thicken and pull away from the sides of the bowl. Knead it with your hands until it reaches your desired consistency.
Pro Tip: If your slime is too sticky, add a tiny bit more activator. If it's too stiff, a little warm water or a small squirt of lotion can help soften it. Always store your creation in an airtight container to keep it fresh for longer.
3. Rainbow Density Tower
The Rainbow Density Tower is a visually stunning experiment that introduces children to the fascinating world of physics. This activity beautifully demonstrates the concept of density by layering different household liquids to create a vibrant, colourful column. Kids can see first-hand how liquids with different weights per unit of volume refuse to mix, creating a mesmerising display that teaches fundamental principles of fluid dynamics and buoyancy. It’s a quiet, mess-contained activity that makes complex scientific ideas accessible and is a perfect example of fun science for kids.
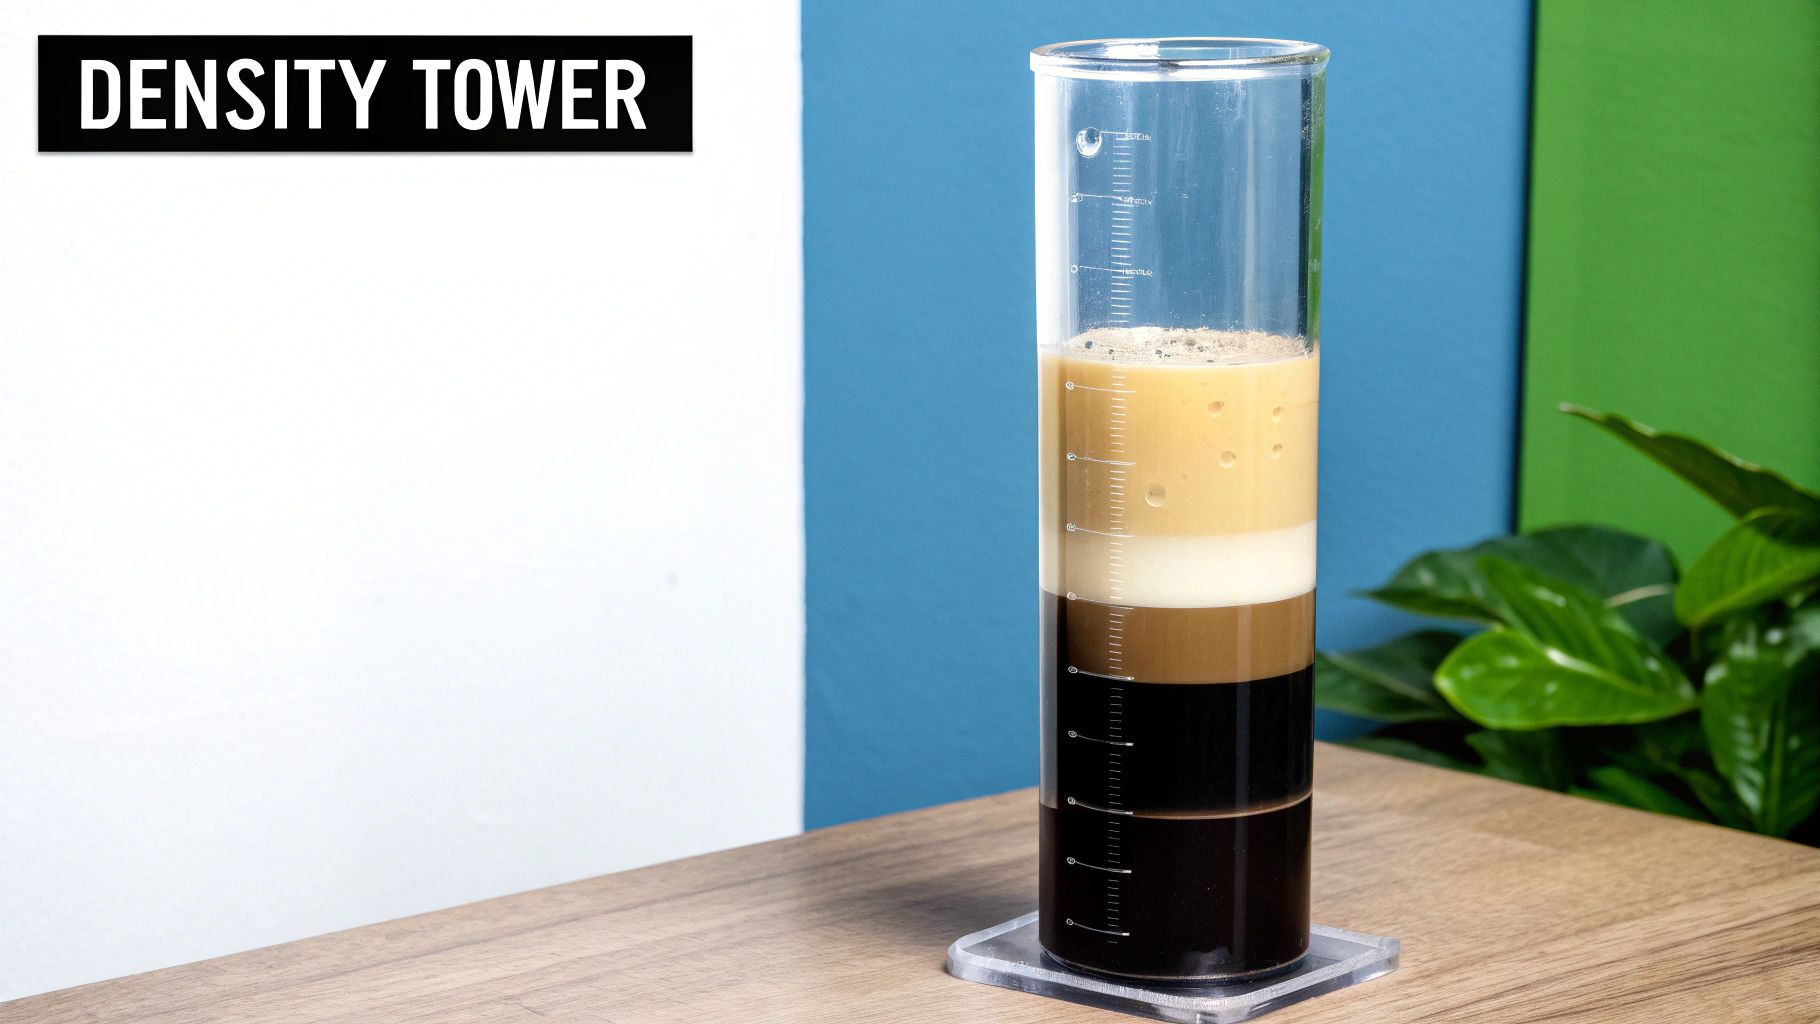
This experiment provides a clear, tangible way to understand that different liquids have different densities. The heaviest, or most dense, liquids sink to the bottom, while the lightest, least dense liquids float on top. This principle of layering is similar to the problem-solving approach in Space Ranger Fred and the Tick Tock Tale, where understanding the correct sequence of events is crucial to saving the day. This popular project is often seen in science museums and on educational YouTube channels.
How to Build Your Tower
This experiment is great for curious minds and is ideal for children aged 6-12 who enjoy visual and methodical activities. It’s a wonderful way to learn about the physical properties of matter.
- Gather Your Liquids: Collect a variety of household liquids with different densities. A good order from most dense to least dense is honey, corn syrup, dish soap, water (with food colouring), and vegetable oil.
- Layer with Care: Start by pouring the most dense liquid (honey) into the bottom of a tall, clear container like a glass or jar. Continue adding the liquids one by one, in order of decreasing density.
- Pouring Technique: To prevent the layers from mixing, pour each new liquid very slowly down the side of the container or over the back of a spoon. This gentle method helps maintain the distinct, colourful layers.
Pro Tip: After building your tower, you can gently drop small objects like a grape, a plastic bead, or a piece of cork into the liquid. Watch to see which layer each object floats on, providing a brilliant extension of the lesson into buoyancy.
4. Invisible Ink with Lemon Juice
Unleash your inner secret agent with the magic of invisible ink made from lemon juice. This fascinating chemistry activity allows children to write secret messages that are completely invisible until a heat source reveals them. It’s a wonderful way to introduce the concept of oxidation, where the acid in the lemon juice weakens the paper's fibres, causing them to turn brown and reveal the message when heated. This experiment combines history and science, making it a truly memorable example of fun science for kids.
This experiment demonstrates that some chemical reactions are triggered by heat. The citric acid in the lemon juice oxidises and turns brown before the paper itself, a concept historically used in espionage by figures like the American revolutionaries. This careful application of a scientific principle to solve a problem is a key skill in STEM, similar to the methodical thinking Fred uses in Space Ranger Fred and the Tick Tock Tale to unravel a time-based mystery.
How to Reveal Your Secret Message
This activity is perfect for a quiet afternoon and introduces chemistry and history in an exciting, hands-on way. It is ideal for children aged 6-12 who enjoy mysteries and creative projects.
- Write Your Message: Squeeze the juice of a lemon into a small bowl and add a few drops of water. Dip a cotton bud, toothpick, or fine paintbrush into the mixture and write a secret message on a piece of white paper.
- Let It Dry: Allow the lemon juice to dry completely. As it dries, your message will become invisible to the naked eye, leaving the paper looking blank.
- Reveal the Secret: To reveal the message, an adult should carefully apply heat. You can do this by holding the paper near a warm light bulb or by gently ironing it on a low setting. The heat will cause the dried juice to oxidise and turn brown, making your message appear.
Pro Tip: For a comparative experiment, try using other acidic liquids like milk, orange juice, or even onion juice. See which one creates the clearest message and discuss why some might work better than others.
5. Crystal Growing Garden
Growing a crystal garden is a beautiful and patient chemistry project that teaches children about solutions, solubility, and molecular structures. This activity brings geology right into the home, allowing kids to witness the slow and magical process of crystallisation. By creating a supersaturated solution with household salts, children can grow stunning crystal formations on pipe cleaners or rocks, offering a tangible lesson in how minerals and gemstones form in the earth. It's a fantastic example of fun science for kids that combines art with earth science.
This experiment wonderfully demonstrates how dissolved solids can return to an organised, solid state as water evaporates. The process of watching individual crystals appear and grow teaches patience and observation, key skills for any young scientist. It’s similar to the careful planning Fred undertakes in Space Ranger Fred and the Tick Tock Tale, where understanding how small, incremental changes lead to a big outcome is crucial for success. This long-term project rewards careful attention to detail with a beautiful, sparkling result.
How to Grow Your Garden
This project is perfect for curious children aged 8-12 who enjoy seeing a project develop over several days. It’s a quiet, mesmerising experiment that results in a creation they can proudly display.
- Create a Supersaturated Solution: With adult supervision, dissolve salt (Epsom salts, borax, or sugar work well) in hot water until no more will dissolve. Add food colouring to create vibrant, colourful crystals. For best results, use distilled water, as impurities in tap water can interfere with crystal formation.
- Prepare Your Base: Shape pipe cleaners into stars, spirals, or other fun designs. You can also use a small, clean rock. Tie a piece of string to your shape and suspend it from a pencil or lolly stick laid across the top of a jar, ensuring it's fully submerged in the solution but not touching the bottom.
- Wait and Watch: Place the jar in a location where it will not be disturbed. As the water cools and evaporates over a few days, crystals will begin to form and grow on your shape.
Pro Tip: Gently scratching the surface of your rock or using a textured pipe cleaner can create more "nucleation sites," which are points where crystals can easily begin to grow, leading to a more complex and dense crystal structure.
6. Dancing Raisins Carbonation Experiment
The dancing raisins experiment is a wonderfully simple yet mesmerising physics demonstration that introduces children to the concepts of buoyancy, density, and carbonation. By dropping raisins into a glass of fizzy water, kids can watch in amazement as the raisins sink, rise, and then fall again in a continuous, enchanting dance. This activity provides a fantastic visual explanation of how gases interact with solids in a liquid, making it a perfect example of fun science for kids.
This experiment cleverly illustrates how carbon dioxide bubbles, which are less dense than water, attach to the raisin's rough surface, acting like tiny life jackets. The added buoyancy lifts the raisin to the surface, where the bubbles pop, releasing the gas and causing the raisin to sink again. This cycle of observation and questioning is a great way to introduce a key scientific skill, much like how the characters in Space Ranger Fred and the Tick Tock Tale learn by observing their surroundings to solve a problem. It’s a great example of inquiry-based learning in action.
How to Make Your Raisins Dance
This experiment is incredibly easy to set up and uses items you likely already have in your kitchen. It’s ideal for children aged 6-12 who are curious about why things float and sink.
- Gather Your Materials: You will need a clear glass or jar, some raisins, and a clear, fizzy drink like sparkling water, lemonade, or soda water. Fresh, highly carbonated drinks work best.
- Start the Experiment: Fill the glass about three-quarters full with the fizzy drink. Gently drop a few raisins into the glass and watch what happens. Initially, they will sink to the bottom.
- Observe the Dance: After a few moments, you’ll see tiny bubbles collecting on the surface of the raisins. Soon, enough bubbles will have attached to lift the raisins to the surface, where they will release the gas and sink back down, repeating the dance.
Pro Tip: Encourage experimentation by trying other small objects with different surface textures, like lentils, small pasta shapes, or sweetcorn kernels, to see which ones dance the best. Discuss why smooth items might not work as well.
7. Elephant Toothpaste Reaction
The Elephant Toothpaste experiment is a showstopper, creating a massive, foamy eruption that fascinates children and adults alike. This demonstration is a spectacular way to witness a rapid chemical reaction, specifically the decomposition of hydrogen peroxide. Using just a few simple ingredients, you can create a huge stream of warm, soapy foam that spills out of its container, offering an unforgettable lesson in catalysis and exothermic reactions. It's an incredibly popular and visually impressive example of fun science for kids.
This experiment perfectly illustrates how a catalyst (yeast) can speed up a reaction. The yeast rapidly breaks down hydrogen peroxide into oxygen and water, and the captured oxygen gas in soapy water creates the massive foam. Understanding how a small catalyst can cause a big, fast change is a key scientific concept, similar to how Fred in Space Ranger Fred and the Tick Tock Tale learns that a small adjustment can fix a much bigger problem with time itself.
How to Create Your Eruption
This activity is ideal for an outdoor science day and provides a stunning visual lesson for children aged 6-12. Be sure to have an adult supervise the handling of the hydrogen peroxide.
- Set Up Your Station: Place a clean plastic bottle (a 500ml one works well) in the centre of a large tub or on a grassy area to contain the foam. Adult supervision is required for this experiment.
- Prepare the Solution: An adult should pour 120ml of 3% hydrogen peroxide solution (the kind available at chemists) into the bottle. Add a good squirt of washing-up liquid and a few drops of your favourite food colouring. Swirl the bottle gently to mix.
- Activate the Catalyst: In a separate cup, mix one tablespoon of dried yeast with three tablespoons of warm water. Stir for about 30 seconds until the yeast is dissolved and bubbly.
- Start the Reaction: Quickly pour the yeast mixture into the bottle and stand back immediately to watch the giant, foamy eruption.
Pro Tip: For a more vibrant effect, tilt the bottle slightly and let the food colouring run down the inside before adding the yeast. This will create fun, colourful stripes in the erupting foam.
8. Static Electricity Hair-Raising Experiments
Exploring the invisible force of static electricity is a fantastic way to introduce children to the world of physics. These hair-raising experiments use simple objects like balloons and combs to demonstrate electrostatic charge, a fundamental concept in science. By rubbing a balloon on their hair, children can witness the astonishing effect of electrons moving from one object to another, creating an imbalance of charge that makes their hair stand on end. This is one of the most hands-on and giggle-inducing examples of fun science for kids.
This experiment provides a tangible lesson in atomic structure, showing how negatively charged electrons can be transferred through friction. The resulting attraction between the positively charged hair and the negatively charged balloon showcases the electromagnetic force in action. Understanding these foundational forces is crucial in STEM, much like in Space Ranger Fred and the Tick Tock Tale, where grasping a core principle is the key to solving a much larger puzzle.
How to Create Your Static Charge
This experiment is perfect for a rainy day indoors and helps explain abstract physics concepts in a very concrete way. It’s ideal for children aged 6-12 who are curious about the invisible forces that shape our world.
- Charge Your Balloon: First, take an inflated balloon and rub it vigorously against your hair or a woolly jumper for about 10-15 seconds. This action transfers electrons to the surface of the balloon, giving it a negative charge.
- Make Hair Fly: Slowly pull the balloon away from your head and watch as your hair defies gravity and stands up, reaching towards the balloon. This happens because the positively charged hair is attracted to the negatively charged balloon.
- Move Objects with Static: Try holding the charged balloon near small, light objects like tiny pieces of tissue paper, salt, or an empty aluminium can on its side. The static charge is strong enough to attract and move these items without you even touching them.
Pro Tip: For the best results, conduct these experiments in a room with low humidity. Dry air is a better insulator, which means the static charge will build up more effectively and last longer, making the effects much more dramatic.
9. Colour-Changing Milk Experiment
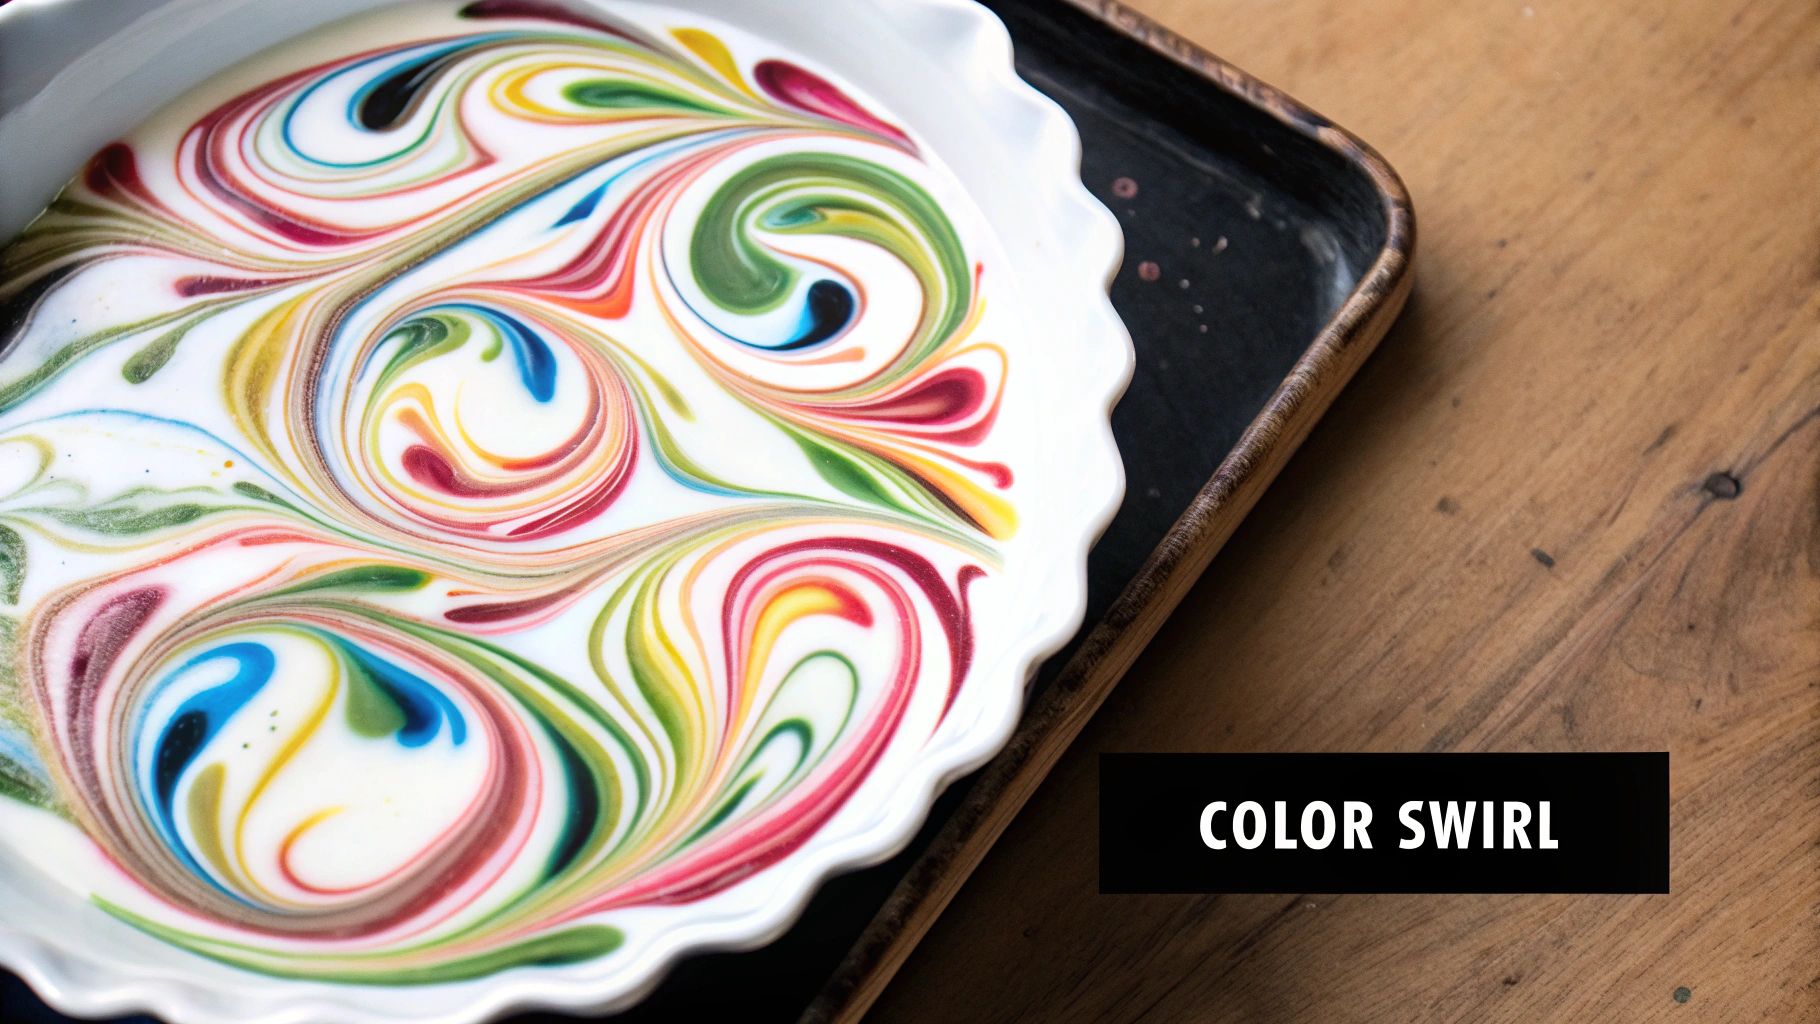
The colour-changing milk experiment is a beautiful and mesmerizing demonstration that brings the unseen world of molecules to life. This activity is a fantastic visual introduction to chemistry, showcasing the principles of surface tension and molecular interactions. By adding a simple drop of washing-up liquid to a plate of milk and food colouring, children can witness a stunning explosion of swirling colours, making it a perfect example of fun science for kids.
This experiment works because the washing-up liquid breaks the surface tension of the milk and reacts with the fat molecules. This sudden chemical reaction causes the food colouring to be pushed around, creating the vibrant, dancing patterns. It’s a powerful way to show cause and effect, much like the problem-solving steps Fred takes in Space Ranger Fred and the Tick Tock Tale, where understanding one small action leads to a big, positive outcome. This is a great way for children to explore their own problem-solving skills.
How to Create Your Colourful Swirls
This experiment is quick, requires minimal setup, and offers instant, stunning results. It’s ideal for children aged 6-12, providing a captivating lesson in chemical properties.
- Prepare Your Canvas: Pour a thin layer of milk into a shallow dish or plate. Whole milk works best due to its higher fat content, which creates a more dramatic reaction.
- Add the Colours: Carefully add a few separate drops of different food colourings to the centre of the milk. Be careful not to stir or mix them at this stage.
- Trigger the Reaction: Dip the end of a cotton bud into some washing-up liquid. Gently touch the soapy tip to the surface of the milk, right in the middle of the colours, and watch the magic happen!
Pro Tip: Encourage your child to experiment by placing the soapy cotton bud in different areas of the milk. Ask them to observe how the colours move away from the soap, demonstrating the reaction's reach and effect.
Fun Science Activities Comparison Table
| Experiment | Implementation Complexity 🔄 | Resource Requirements ⚡ | Expected Outcomes 📊 | Ideal Use Cases 💡 | Key Advantages ⭐ |
|---|---|---|---|---|---|
| Volcano Eruption with Baking Soda and Vinegar | Low to moderate: simple setup, one-time reaction | Common household materials, low cost | Visual foam eruption illustrating acid-base reaction | Introductory chemistry, geology demos, kids' science fairs | Safe, engaging, teaches multiple concepts |
| Slime Making Laboratory | Moderate: multiple recipe steps, ingredient handling | Requires glue, borax/activators, additives | Tactile slime demonstrating polymer chemistry | Hands-on chemistry, sensory learning, creative play | Customizable, reusable, interactive tactile experience |
| Rainbow Density Tower | Moderate: careful layering, patience needed | Various household liquids | Colorful layered liquid tower demonstrating density | Physics demos, visual density lessons | Long-lasting visual, safe materials, clear concept display |
| Invisible Ink with Lemon Juice | Low to moderate: writing + heat source use | Lemon juice, paper, heat source | Hidden message revealed by oxidation reaction | Chemistry with history, secret message activities | Natural materials, creative storytelling, safe |
| Crystal Growing Garden | Moderate to high: initial setup easy, long wait | Salts, water, containers, growth medium | Beautiful crystals illustrating crystallization | Long-term projects, geology and chemistry education | Lasting results, teaches patience and scientific observation |
| Dancing Raisins Carbonation Experiment | Low: simple pouring and observation | Carbonated water/soda, raisins | Raisins “dance” showing buoyancy and gas solubility | Physics demos, beginner science exploration | Immediate results, safe edible materials, multiple concept demonstration |
| Elephant Toothpaste Reaction | Moderate: requires careful handling of chemicals | Hydrogen peroxide, catalyst, dish soap | Large foam eruption demonstrating catalysis | Dramatic group demos, chemistry concepts | Spectacular visual, teaches reaction kinetics |
| Static Electricity Hair-Raising Experiments | Low: simple repeated experiments | Balloons, wool, small objects | Hair raising, small object movement from static charge | Electricity basics, interactive classroom demos | Immediate visible results, safe, encourages experimentation |
| Color-Changing Milk Experiment | Low: quick setup, simple steps | Milk, food coloring, dish soap, cotton swabs | Swirling color patterns demonstrating surface tension | Visual chemistry demos, early STEM education | Stunning visuals, simple materials, quick results |
Your Scientific Journey Is Just Beginning!
And there you have it – nine fantastic voyages into the world of science that you can start right from your kitchen table! From the explosive fun of a bicarbonate of soda volcano to the mesmerising swirls of colour-changing milk, we hope this list has shown you just how accessible and thrilling hands-on science can be. Each experiment is more than just a fun activity; it's a new story waiting to be told and a new mystery to unravel.
Remember how in Space Ranger Fred and the Umbrella Rescue, Fred had to think creatively to solve a problem with the tools he had? That’s exactly what you've been doing with these activities. By mixing, measuring, and observing, you’re not just following instructions; you’re building essential problem-solving skills, honing your observation abilities, and feeding your natural curiosity. This is the very heart of what makes science so exciting and is a core part of providing fun science for kids.
The Power of 'Why?'
The most important tool for any scientist isn't a beaker or a microscope, it's the question "Why?". Why did the raisins dance? Why did the colours in the milk spread out? Each of these experiments is a launchpad for even bigger questions and deeper exploration. Don't be afraid to change a variable and see what happens.
- What if you used a different type of vinegar in the volcano?
- Could you use a different liquid instead of water for the density tower?
- What other objects might "dance" in carbonated water?
This kind of questioning and experimentation is precisely how scientists make groundbreaking discoveries. You are practising the same skills that have led to humanity's greatest achievements, all while having a fantastic time.
From Kitchen Science to Cosmic Adventures
The journey of discovery doesn't have to stop here. The principles you've explored, like chemical reactions in the elephant toothpaste and density in the rainbow tower, are the same principles that govern our world and the universe. Realising that these big ideas can be understood through simple, fun science for kids is a powerful first step.
The world is your laboratory, and every corner holds a new phenomenon waiting to be understood. Keep asking questions. Keep experimenting safely. And most importantly, keep that spark of wonder alive. The skills you build today will help you understand the complex world of tomorrow, whether you're building a robot, curing a disease, or exploring the stars. What will you discover next?
Ready to blend your love of science with an out-of-this-world adventure? The books from Space Ranger Fred are designed to inspire curiosity and a love for STEM through captivating stories, just like the experiments you've tried today. Continue your journey of discovery at Space Ranger Fred and see where science and storytelling can take you